Download WePay's API
OpenAPI
| 3.2 | |
|---|---|
| Released Version | |
| 3.1 | |
| Released Version | |
| Pre-Release Versions | |
| 3.0 | |
| Released Version | |
| Pre-Release Versions | |
Postman
Step 1: Sign Up in Partner Center
Start by heading over to partner.wepay.com.We recommend using an aliased email address to sign up (something like payments@your-company.com) as this allows for multiple people to access your company's account, instead of tying it to a single person's login. This also allows the person responsible for filling in Know Your Customer (KYC) details to do so at a later time while you onboard to the API and begin making calls.
If you're simply testing the API, it's fine to use your own email address, and create a separate account using an alias at a later time.
Here, you will find your:
- App ID
- API version
- Your platform's Legal Entity ID
- Your platform's Account ID
- App tokens
Step 2: Confirm Email Address
Make sure to confirm your email address once you've finished signing up for an account. If you haven't, be sure to visit here, and click the banner to resend the confirmation email.

Step 3: Generate a Token
Once sign up has been completed, log in to your account with your confirmed email.
The first screen you will see is set to the Staging environment, and before you can start testing the API, you will need to generate your App Token.
Simply click “Create Token”, enter a unique name, and hit save. In this example, we named it "first_token".
Note that the Legal Entity and Account IDs displayed with your API credentials are specific to your platform; each merchant will require their own Legal Entity and Account.
You can generate up to three tokens, though it is not necessary to generate more than one token. As an example for using multiple tokens, you can think of each as a way to logically separate different components of your system which may interface with different parts of the Clear API. For example, you could have one service that exclusively deals with payment processing, which would have its own token that is revocable at any time.
Recommendation
As a security precaution, rotate your App Tokens every 3 months by visiting the Partner Center. Delete your current tokens, create new tokens, and replace your old tokens with your new ones.


Step 4: Fork our 3.0 API Postman Collection
Ensure you have an account with Postman. If you don't, be sure to create an account.
Click on the button below to visit our public workspace. You can fork the most recent collection.
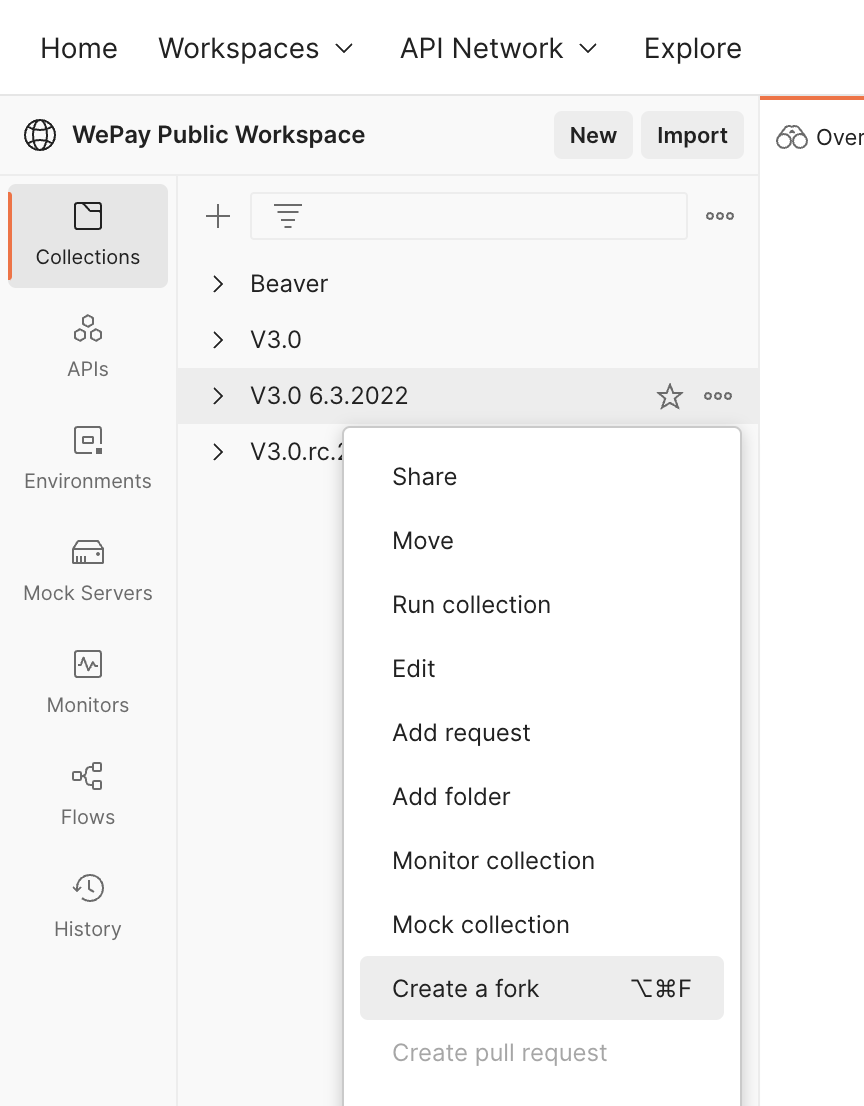

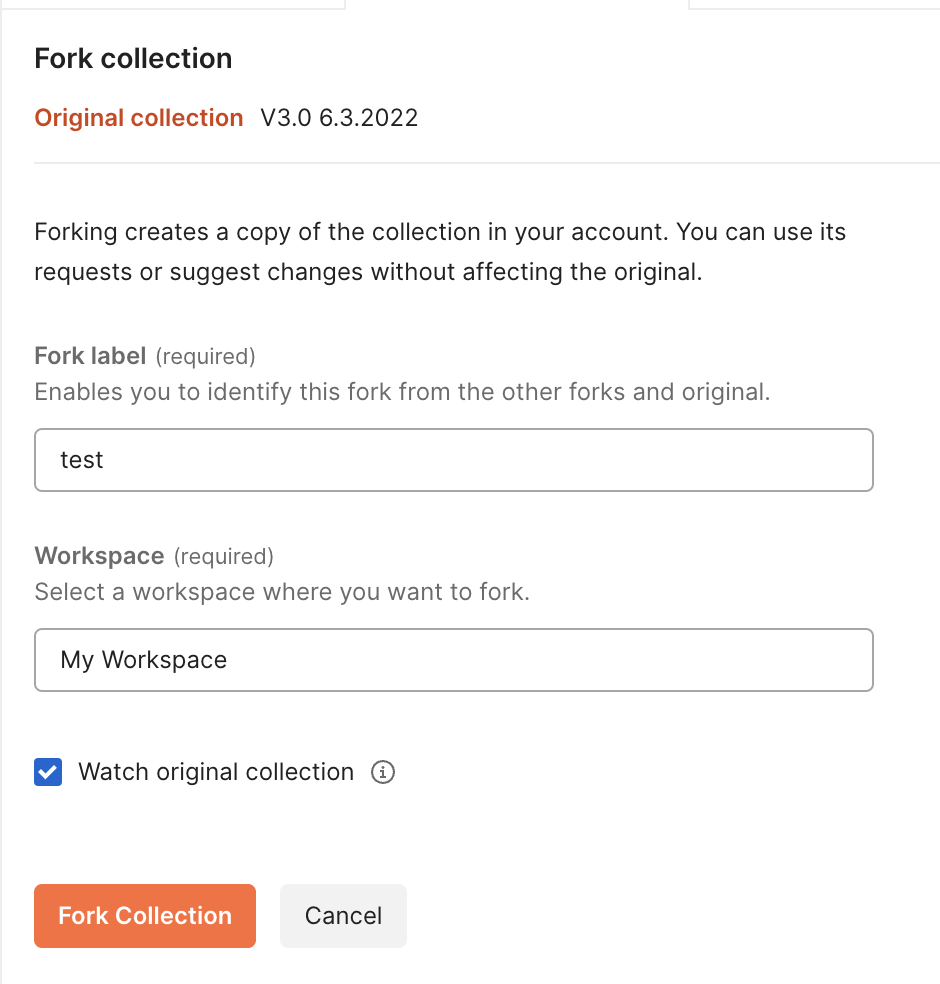
Here, we will name our fork label "test" and add it to a personal workspace.

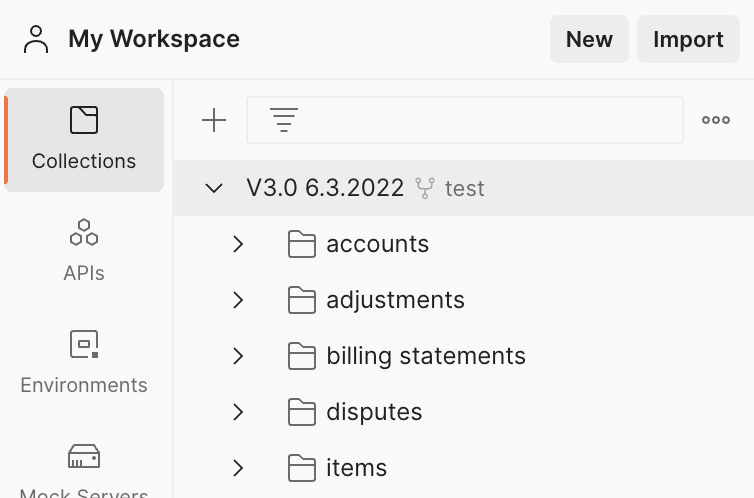
You should now see the forked collection in your collections on the left panel.

Step 5: Fork our Environment Variables
Similar to Step 4 above, here we will fork our WePay Stage Environment variables.
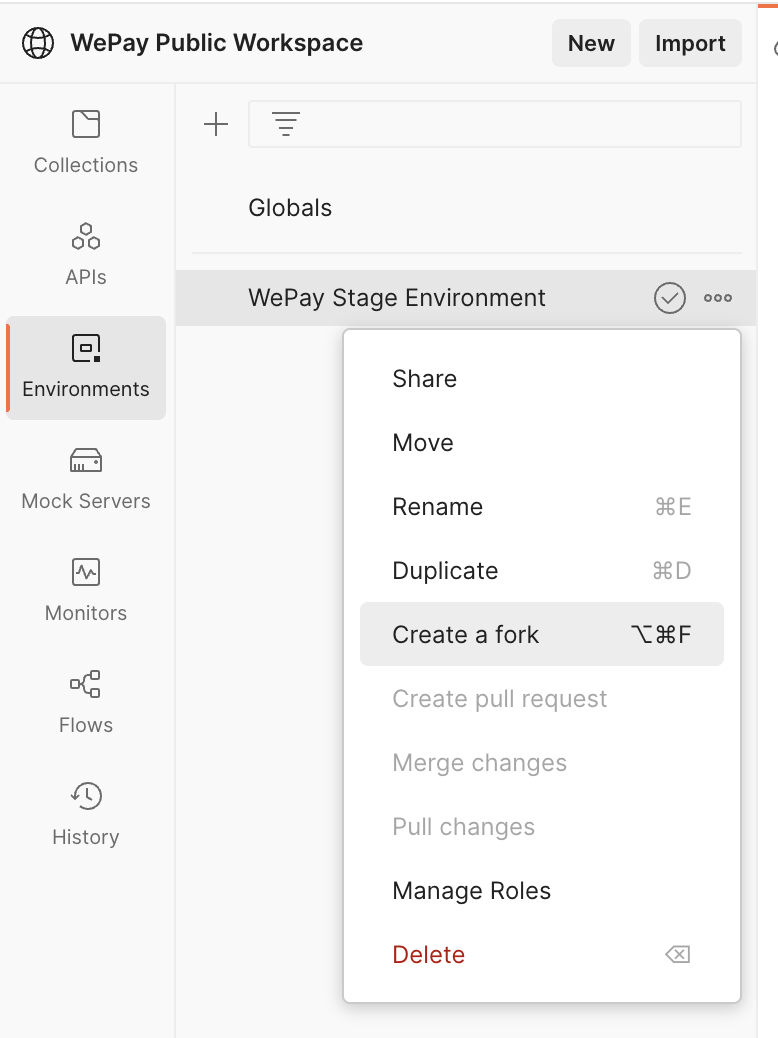

This will create a new environment called “WePay Stage Environment.” This way, we can easily reference variables that are commonly used in our API calls:
- Base URL
- App ID
- API version
- App token
- Content type
You can fill in the blank values with your own App-Id and App-Token. Refer to your credentials from Partner Center and fill them in as the initial and current value.


Step 6: Make API Calls
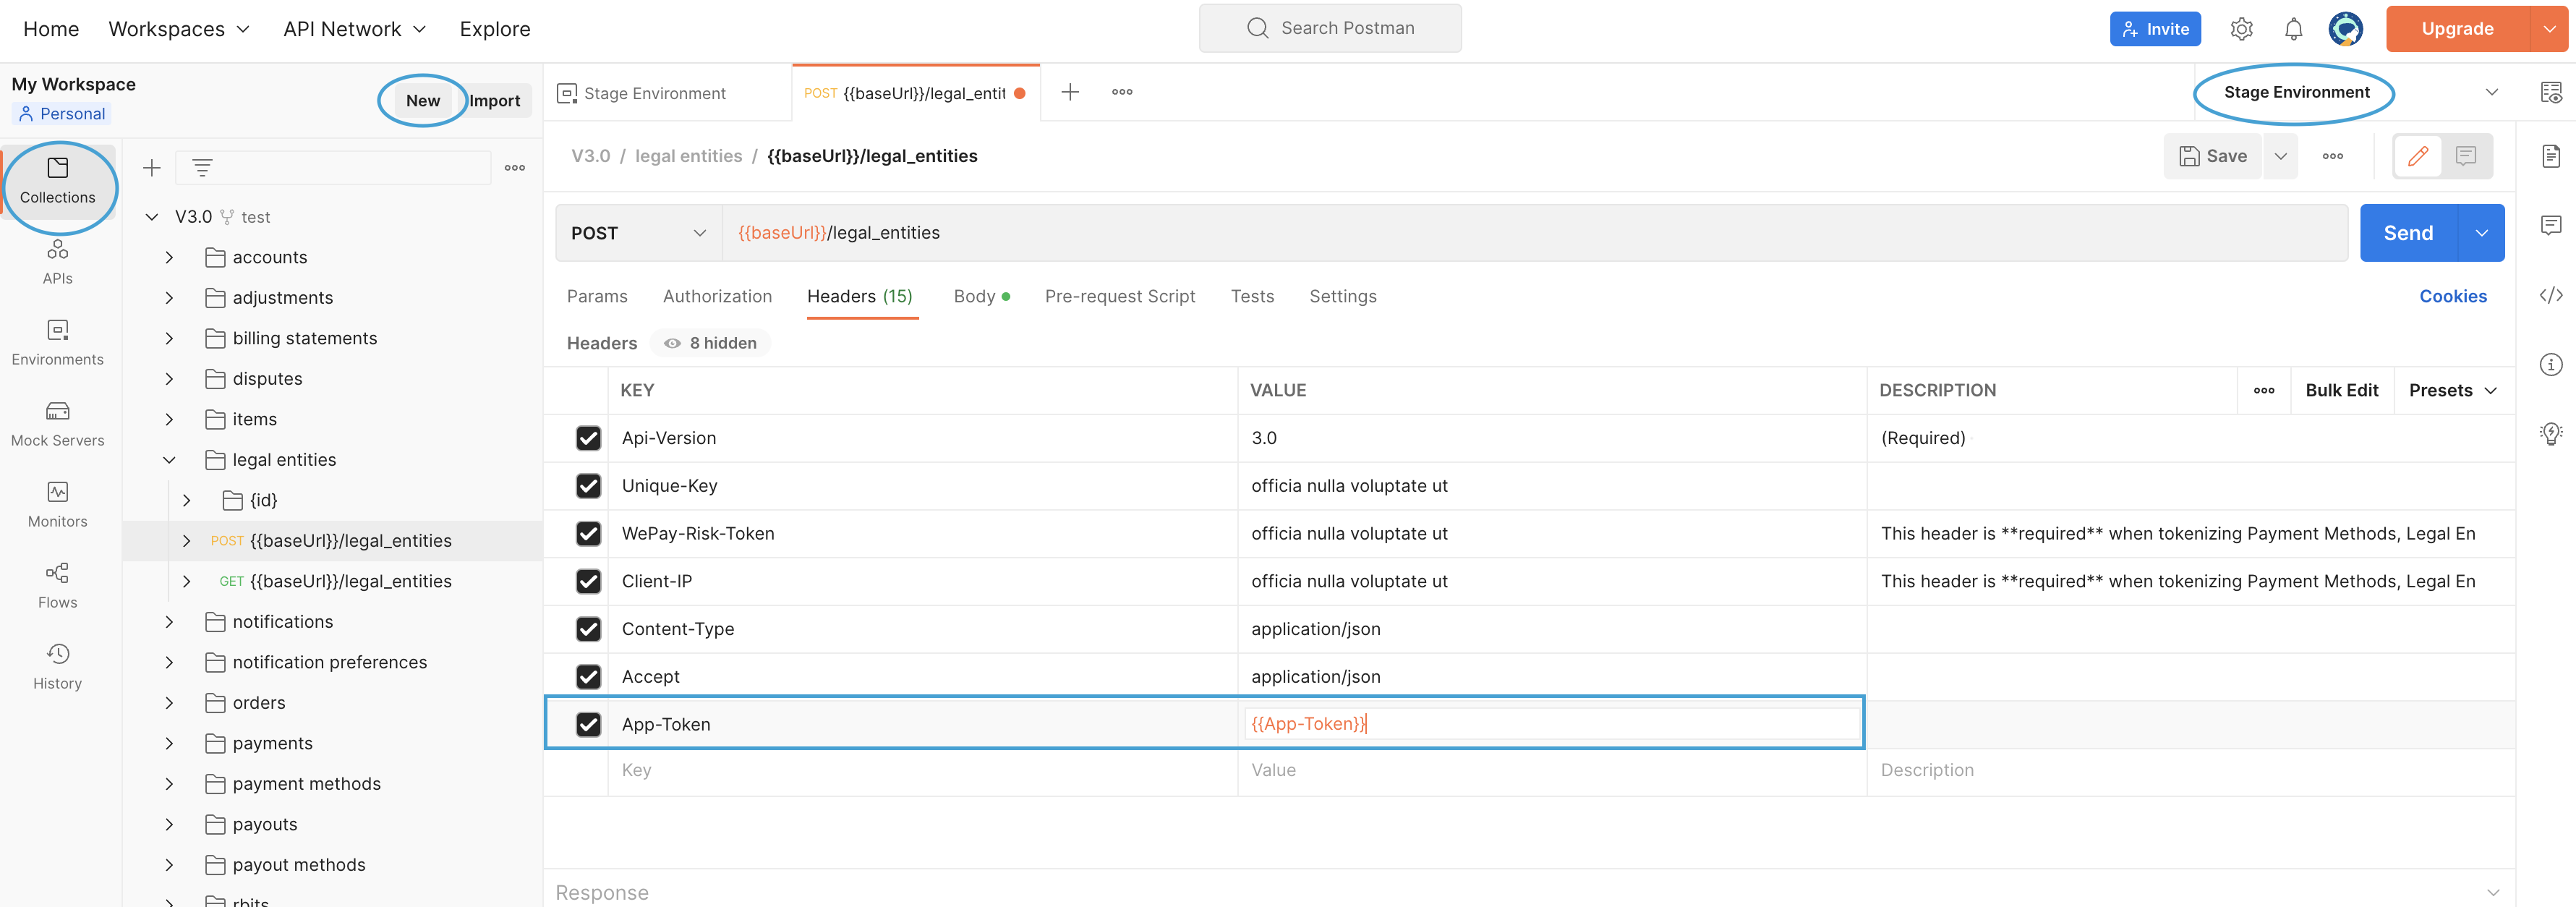
Now you are ready to send requests! Refer back to your Collections and ensure you are in the Environment you just created. When you select an API call, you can go to the Headers tab and fill in the required headers for each call by filling them with your environment variables. In the example below, we typed a new key called “App-Token” with Value being {{App-Token}}. A dropdown menu should pop up after you type the first curly-brace when using environment variables.
Note
Be sure to keep in mind selected and unselected headers for each API call. You can exclude headers by unchecking the check box next to each key.

 Clear
Clear Link
Link